Some useful tips to resurface a worn or damage concrete
The concrete surface gets ruptured due to the exposure to the materials for prolonged vehicle pressure and foot traffic.
Rather than repairing the concrete from the very beginning, resurfacing concrete is a much inexpensive and simple method. Given below, some useful steps for concrete resurfacing :-
Step 1 - Surface Clean: Clean the surface properly to eliminate all debris as well as dirt, oil, crumbling bits of concrete etc. by spraying the area through a pressure washer.
Step 2 - Patch Cracks: Once the surface of the concrete is fully cleansed, check for any deep cracks or spalling. If any crack or spalling exists, close the openings with a patching compound. The compound is used along with a putty knife for dealing with smaller cracks or a caulking gun for dealing with bigger ones.
Step 3 - Hose Down: As soon as the patching compound is dried, choose a regular garden hose and water down the surface of the concrete to chill the concrete and facilitate to arrange for the finest adhesion. Prior to start, ensure to remove all standing water with a broom.
Step 4 - Blend the Resurfacer: It?s recommended to blend the resurfacing compound in a 5-gallon bucket by applying a power drill. It can be done manually but there will be lots of lumps in the mixture. Ensure to maintain the exact amount of water-to-resurfacer ratio to produce a smooth mixture with the uniformity of syrup. In case the mixture is too light, include more resurfacer. In case, it is extremely thick, include more water.
Step 5 - Weatherstripping: Refrain from using resurfacing compound to expansion joints since they provide protection against cracking. It can be simple done by arranging some weatherstripping in the joints to exclude the compound.
Step 6 - Use Resurfacer: The weather is a key factor to dry the resurfacer quickly. Apply cold water and retain the compound in the shade so that the mixture can work perfectly. It is also possible to work in sections and mix another batch of compound if required. While using the compound, pour it on the concrete in wide strips. With the use of squeegee, circulate the mixture before it becomes dry. The surface should be smooth and level as much as possible.
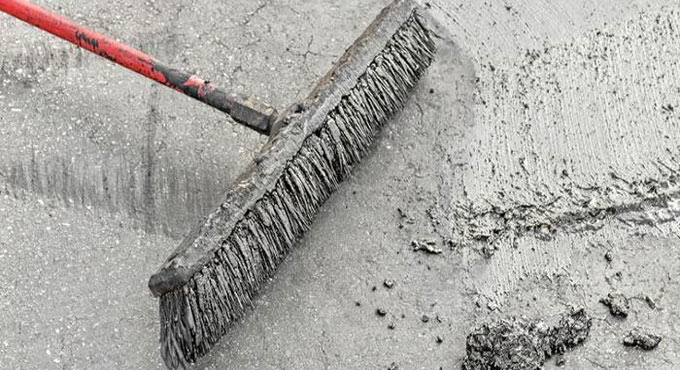
Step 7 - Texture: With the use of a simple wire broom, provide a textured appearance to the concrete. The compound should be dried for about five minutes and then rake the broom across the surface in a consistent direction. It will provide a textured look as soon as the compound is dried and produce a non-slip surface for wet or icy weather.
Step 8 - Finishing Touches: As soon as the resurfacing compound gets dried, take out the weather stripping from the expansion joints. This step should not be taken too early since the compound will spill into the joints. If it is done behind time, the task will be difficult for eliminating the strips.
Step 9 - Dry: Once the mixture is circulated and textured, keep it to dry for 24 hours. The resurfacer will start to cure throughout this time. While using the compound in the summer, it is necessary to spray the driveway with water so that the resurfacer can?t be dried too fast and produce crack.
Step 10 - Sealer: After two hours of drying time, the concrete will be ready to walk on it. Any vehicle can move on the surface after about six hours. Once 24 hours is completed, a waterborne masonry sealer should be used to enhance the longevity of surface.
The following equipments will be required for resurfacing of concrete :-
Pressure washer, Patching compound, Putty knife, Caulking gun, Garden hose, Broom, 5-gallon bucket, Power drill and mixing blade, Resurfacing compound, Weatherstripping, Squeegee, Wire broom, Safety glasses and gloves.


