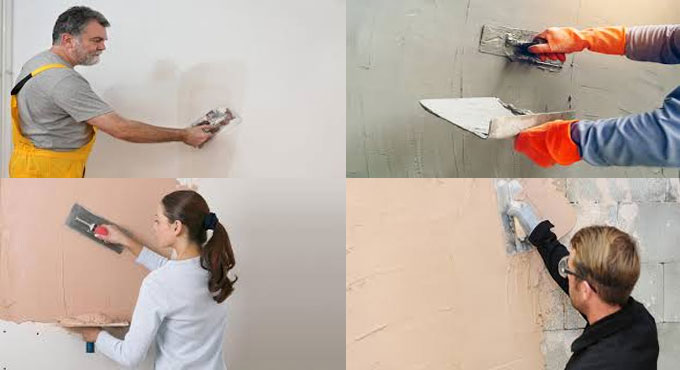
Step-by-step guidelines for perfect plastering
This civil engineering article shares some useful guidelines to provide superior finish to your plastering work.
Step 1: Preparation - Prior to initiate working on your walls, arrange a dustsheet to take care for your floors and acquire any waste or plaster spillage. After that, ensure that the area going to be plaster does not contain any dust and loose garbage. It will be mostly suitable when plastering is done for an aging existing wall. It is also required to cover any existing holes and cracks. The screen tape can be applied for this purpose. When the plastering is done for newly constructed plasterboards, always employ screen tape to mask all the joints among the boards.
Step 2: Apply PVA to walls - By applying PVA for bonding, makes sure that the layer of plaster going to be utilized afterward will dry out uniformly. Dilute the PVA in the proportion if 1:4 i.e. one part PVA and four parts water. Roll or brush the PVA mixture onto the wall and ensure to wrap the whole wall.
The first layer of plaster should be provided straight afterwards once the PVA glue turns out little gluey. It is suggested to abide by the instructions from the manufacturer of the glue.
Step 3: Mix plaster - Ensure to use a dust mask prior to open up the bags of plaster. The plaster should be blended into cold water, stirred vigorously so that it attains the uniformity of thick custard. No lumps should exist in the mix.
Step 4: Apply plaster - Now, the first coat of plaster can be used with the hawk board, the trowel and the float. Be aware with the proper technique prior to apply the plaster in actual project. It will be better to apply the plaster on separate plasterboard for practicing purpose.
Initially, arrange the plaster on the hawk board with the trowel. Provide the plaster from the hawk onto the walls with the help of float. It should be accomplished with the float adjacent to the wall, expanding the plaster stiffly upwards and leveling the float at the end of each sweep. The work should be commenced from the bottom left-hand corner and upwards, filling a section from bottom to top prior to shift to the next section.
Apply small amounts of plaster each time together with lots of pressure on the float to retain a smooth look and get rid of surplus plaster falling off the wall. The process should be reiterated unless the wall is covered fully.
Step 5: Skim and smooth - After providing the first coat of plaster, wait about 20 minutes so that the plaster becomes dry to some extent. Then the lumps and bumps can be avoided by smoothing over with the trowel. All the corners and ends like the bottom and top of the wall should be leveled properly. A wet brush should be applied to level the edges out.
Step 6: Scrape - Sometimes, the surface should be scraped prior to provide a second coat. To simplify the process, a tool known as devilling float is applied. It refers to a wooden float containing nails in it. The surface can be scratched with an old kitchen fork. If you want to avoid this step, ensure that the first coat on the wall is still wet prior to provide the second layer of plaster.
Step 7: Use plaster - After devilling or scratching the first level of plaster, the second and final coat should be provided. The consistency of the plaster should be thinner as compared to the first coat in order that the plaster can be diluted with some more water. The plaster should be done with a thin 2 mm layer. Then put down the plaster to dry to some extent.
Step 8: Finishing touches - Once the plaster is dried little bid, the work should be polished up with the inclusion of water to the surface through a spray gun. Spray the edges of the plaster and then put the trowel over it to level the surface. While performing this, apply inward strokes. As an alternative, a wet brush can be applied for the job, specifically around the hard edges. The work should be completed by providing a clean float over the complete surface to level any lumps and bumps.
As soon as the plaster is dried out fully, with the help of some sanding paper eliminate any excess plaster that may exist.
Step 9: Painting and wallpapering - The painting should be started after the plaster becomes fully dry. Prior to paint over the new plaster, a undercoat is used to prime the surface.


